Converting a van to a tiny home... Part 1: Prep, prep, prep
- One Girl and a Van

- Apr 14, 2020
- 3 min read

Who doesn't love Pinterest?! When I first got my van, I lost days of my life scrolling social media, watching YouTube videos, drawing plans and writing lists! This was a momentous moment, I was going to take a giant yellow van, which smelt slightly of urine and had some strange 'tribal' markings on the back door (no idea what it was still to this day!), in to a little cosy home on wheels...
Honestly, I must have drawn over 20 different designs for Buttercup. It's quite amazing all the different ideas and layouts you can create for such a small space. Initially I wanted to add a bathroom, kitchen, sitting area and fixed bed; so I drew up designs to fit around those key areas. I marked out the areas on the van floor and walls and walked the space and sat just staring at the walls for hours!

Stage one was to remove the big chunky metal bulkhead. I wanted to be able to get to and from the cab without exiting the van, in case of emergencies or horrendous weather. Plus, I'd managed to lock myself inside, requiring rescuing on a few occasions during the first couple of days, due to slam locks having been fitted!
The bulkhead took hours to remove; why are there so many bolts?! In fact, everything about converting the van took a lot longer than my perfectly drawn up project plan and schedule... But, eventually I managed to remove it and found the cause of the urine stench; 3 pee bottles stuck behind the seats, and some other 'stuff'. It's amazing how much rubbish accumulates behind seats; alas nothing of use and no £10 notes!

Tah dah! So much lighter even with the top section still in place, but eventually I removed this too with the plan to build storage in the huge overhead space in the cab.
This seemed a great time to go on our first adventure... So I lobbed a mattress, bedding, dog crate and cooking gear in the back and off we went to Cornwall for some Easter break fun in the sun. This was a great idea as it really helped me to decide on how I would use the van and try out some different layouts without committing to the build. In fact, the dogs, my niece and I went on a few adventures like this...
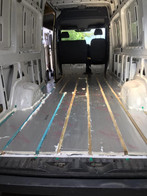
My next job was to start ripping out the old ply lining and to install a new insulated floor. I decided to use Celotex on the floor and roof, Therma Foil insulation for the wheel arches, and lambs wool for the walls. This worked so well and the van is now toasty warm in winter and doesn't get too hot in the summer. I used 12mm ply for the floor and laid batons in the grooves of the van floor to ensure a level surface, these were stuck down with Sikaflax EBT+ adhesive. I cut the Celotex to fit with a Stanley knife and stuffed it in the gaps before cutting the ply to size (I used the old boards as templates) and screwing the sheets to the batons. I filled any huge gaps with expanding foam and trimmed it back to neaten up (steady on the trigger with this stuff!). Covering the wheel arches was just a matter of wrapping them like a Christmas present and sticking the foil in place with silver tape... Simples!
If I was doing it again, I would create more of a grid with the batons to avoid weak spots on the joins.
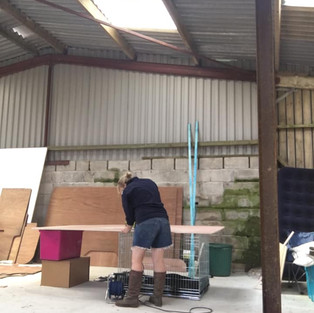
No need for fancy workbenches or specialist PPE! However, I'd advise wearing boots or trainers; it hurts when you drop stuff on your toes wearing flip flops!
Finally, to finish the floor, I laid a nice pale grey vinyl... what was I thinking with dogs! It was super easy to lay and looks gorgeous, but it's a nightmare to keep clean and in hindsight I wish I'd gone with a wooden floor but I just couldn't justify the cost at the time. Vinyl is soooo simple to fit; tape measure, Stanley knife, steady hand and some carpet glue spray... boom.
So, there we go. Stage 1 complete and I could now crack on with electrics, insulating the walls and getting the ceiling up. But first, time for another adventure...


Comentarios